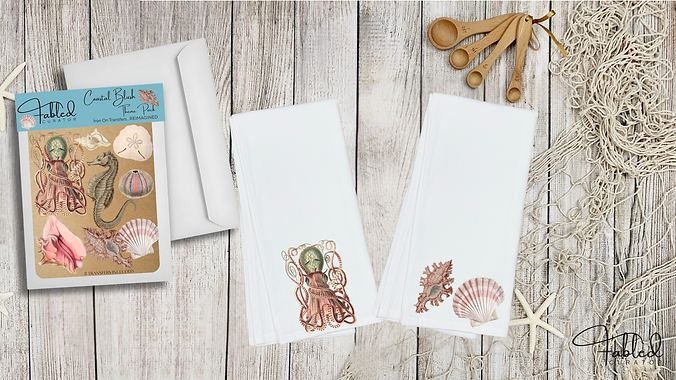

How To Use Our Transfers
Customizing your clothing, home decor, or accessories with The Fabled Curator Transfers is a fun and easy way to express your creativity. To ensure the best results and long-lasting designs, here’s a step-by-step guide to using our high-quality transfers.
Let's Get Started - It is Easy!
It’s simple – Place, Heat, & Peel.
But for those who like a little more guidance (and to ensure the best results), we’ve included detailed instructions to walk you through the process.
Take a moment to read through them, then dive in and enjoy the creative fun!
Step 1. Prepare Your Fabric
Before you begin, it’s important to prewash and thoroughly dry your fabric. This step is essential for a couple of reasons:
-
Prevent Shrinking: Fabrics like cotton may shrink slightly when washed, and we want your design to stay in place.
-
Remove Coatings: Some fabrics come with protective coatings that could interfere with the transfer’s adhesion. Washing removes any residual finishes and ensures a clean, smooth surface for the transfe
Once your fabric is clean and dry, you’re ready to begin!
Step 2. Position Your Transfer
-
Choose Your Design: Pick the perfect design for your project! Each package of The Fabled Curator Transfers comes with a detailed instruction sheet that includes all the steps, settings, and tips you’ll need.
-
Place the Transfer: Position your transfer on the fabric where you want the design to go. Ensure it’s straight, centered, and exactly where you want it before you press.
Step 3. Test with the Sample Transfer
-
For peace of mind, we’ve included a sample transfer with every package. Before applying the main design, test the transfer on a small piece of fabric to make sure you’re comfortable with the process and settings. This gives you the chance to adjust any specifics to your liking.
Step 4. Applying Heat - The First Press
-
Now it’s time to apply the transfer to your fabric:
-
Iron Settings: Set your iron to the appropriate heat setting based on your fabric type. We recommend medium to high heat for most fabrics, but please refer to the specific guidelines for best results.
-
Use The Fabled Curator Iron Paper: This special iron paper is included in each package. Place the iron paper over the transfer before you press to protect the design and fabric.
-
Press Firmly: Apply firm and even pressure on the iron for the recommended time (usually 20-30 seconds). Make sure you cover the entire transfer area for a thorough application.
Step 5. Second Press - Sealing the Design
-
Once you’ve completed the first press, it’s time for a second press to seal the transfer in place and ensure long-lasting adhesion:
-
Place the Transfer: If necessary, reposition the transfer before applying the second press to ensure it’s perfectly aligned.
-
Use Iron Paper Again: Place the Fabled Curator iron paper over the transfer once more before you press.
-
Press Again: Apply firm, even pressure for another 20-30 seconds. This step helps set the transfer and gives it that professional, durable finish.
Step 6 - Peeling & Checking your Design
-
Cool and Peel: After pressing, allow the transfer to cool for a minute or so before gently peeling off the backing paper. If any part of the design lifts, simply reapply heat and press for a few more seconds.
-
Check the Adhesion: Ensure the transfer is securely attached to the fabric. If you notice any areas where the transfer isn’t fully adhered, just repeat the pressing process.
-
Long-Term Care and Maintenance
-
Once your design is successfully applied, it’s important to follow a few care tips to keep it looking great:
-
Wash Inside Out: Always wash your fabric items inside out to protect the transfer.
-
Cold Water: Wash with cold water to prevent fading or damage.
-
Avoid Bleach: Harsh chemicals can damage the transfer, so we recommend avoiding bleach.
-
Air Dry: If possible, air dry your items to avoid heat damage from the dryer.
-
Repress if Needed: Over time, the transfer may need a little touch-up. You can repress the design using the same process if you notice any peeling or fading.
-
For More Tips, Troubleshooting & Support
-
We want your creations to last and look amazing, which is why we’ve included a detailed instruction sheet with every transfer. For additional tips, troubleshooting advice, or any questions you may have, feel free to visit our FAQ page.
-
And if you need further assistance, our team is here to help! Just send us an email at hello@thefabledcurator.ca, and we’ll be happy to support you on your creative journey.
-
Enjoy Your Creation!
-
Now that your transfer is applied and set, enjoy the fruits of your labor! Whether it’s a personalized t-shirt, a custom tote bag, or an upcycled piece of home decor, your creation is one-of-a-kind and ready to shine. Let your creativity flow, and have fun customizing your world with The Fabled Curator!